March 5, 2025
How to Capture the Perfect Twilight Real Estate Photos

Stay Ahead in Real Estate Marketing!
Stay Ahead in Real Estate Marketing!
Stay Ahead in Real Estate Marketing!
Join our newsletter for exclusive tips, tools, and updates to transform your listings and grow your business.
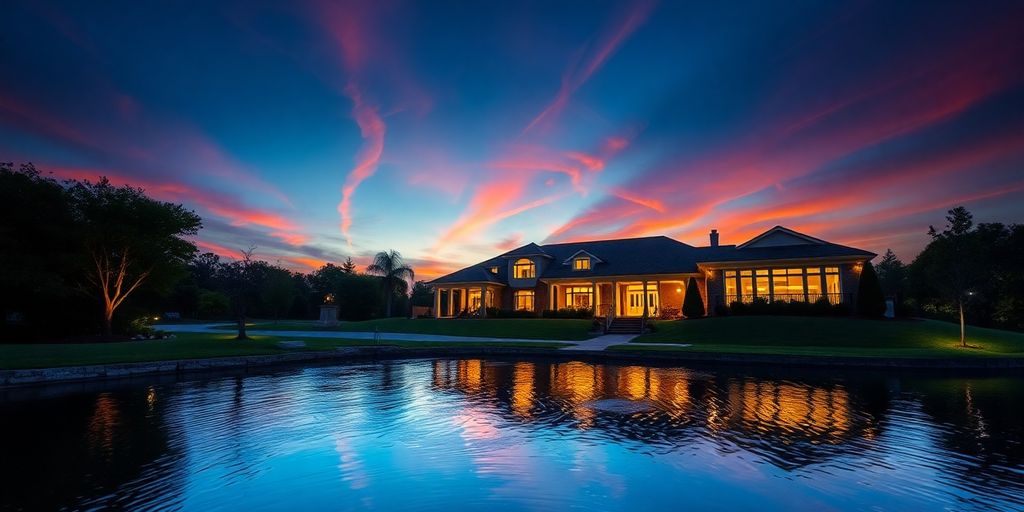
Capturing stunning twilight photos for real estate can make a property shine. The right images can draw potential buyers in and make a lasting impression. In this guide, we'll explore how to take those perfect twilight shots, from timing and equipment to techniques and post-processing. Let's dive into the world of twilight photography and learn how to make your listings stand out.
Key Takeaways
Twilight photography significantly boosts property appeal and listing views.
Timing is key; aim for the golden hour just after sunset or before sunrise.
A sturdy tripod and the right lens are essential for low-light conditions.
Balancing natural and artificial light creates captivating images.
Post-processing is crucial; enhance colors while keeping the look natural.
The Impact of Twilight Photography in Real Estate
Enhancing Property Appeal
Ever notice how a house looks way more inviting when it's bathed in that soft, dim light? Twilight photography really pulls that effect off, making the place look warm and welcoming. This is a game changer for real estate photos. It brings a fresh twist to a listing and highlights unique outdoor features—like pool lights or garden spots—that might get lost in harsh daylight. For example, many agents now rave about the way Twilight shots add an extra layer of charm, giving viewers a hint of ambiance that ordinary photos just don’t show.
Increasing Listing Views
When homes are photographed at twilight, they tend to stand out in online listings. This isn’t just about soft lighting; it’s about creating an image that sparks interest. Here are a few reasons why listings see more clicks:
The warm glow melts away the usual flat look
Shadows add a sense of mystery and depth
Cooler, balanced light draws the eye
The effect is that potential buyers often pause a bit longer on these images, which can help increase overall engagement.
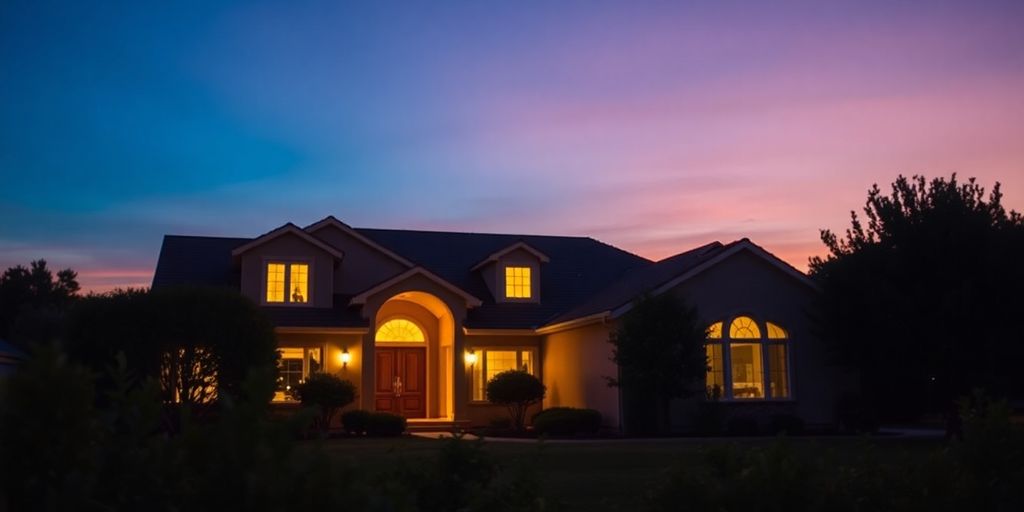
Creating Emotional Connections
Twilight photos don’t just show a property; they tell a story. Many buyers have fond memories of a sunset walk or the calm after a busy day, which these images evoke. They invite you to imagine your evenings in a cozy, well-lit home.
There’s something uniquely comforting about seeing a home softly lit at dusk, almost like it's inviting you in after a long day.
This personal touch often nudges buyers into picturing themselves living in the space, which can make all the difference when a decision hangs in the balance.
Picking the Right Time of Day
Understanding Twilight Timing
It all starts with nailing the right moment. At twilight, natural light dances quickly, so timing is everything. Many photographers say that the best period is about 20 minutes after sunrise or before sunset when colors pop and shadows settle. A simple plan would be:
Arrive at least an hour early to set up
Get comfortable with your camera settings
Keep an eye on the changing light
You might even consider checking real estate shots for extra ideas on timing.
Below is a quick reference table to keep track of key moments:
Time Period | Duration Estimate | Note |
|---|---|---|
Early Morning Glow | ~10-15 minutes | Gentle light, ideal for details |
Pre-Sunset Window | ~10-15 minutes | Rich warm tones, inviting feel |
Setup Preparation | ~60 minutes prior | Ensure all gears are in place |
Golden Hour Significance
The golden hour brings warmth and a soft quality to every photo. This window can transform a simple property shot into something much more inviting. Remember, sometimes less is more; a few careful shots during this time can speak louder than a bulk of photos. Time is the key factor in a perfect shot. The light during this period is naturally flattering, emphasizing curves and textures, making the property look extra appealing.
Shoot at the right angle
Adjust camera settings to match the dimming light
Keep testing and occasionally review your setup
It's no wonder many pros swear by the golden hour for that extra bit of magic.
Setting Up for Success
Good preparation goes a long way. Visit the property early, inspect where the light falls, and decide on the best spots for each shot. Make adjustments in your equipment based on what you see. Some photographers even bracket exposures to cover the subtle light changes.
Being ready means you won’t be caught off guard. Planning your angles and settings can make the difference between a missed moment and a captivating shot.
While there are many small details to consider, a calm mindset and solid plan set you up for success. Keep these pointers in mind and enjoy the process – capturing the perfect twilight scene is as much about patience as it is about skill.
Equipment Essentials for Twilight Photography
Choosing the Right Camera
When the light starts to fade, you need a camera that can handle low light without a hitch. Look for one that does well in dim conditions, offers manual controls, and has a good sensor. Consider these points when picking a camera:
Look for models with low noise at higher sensitivities.
Check if it supports RAW capture, so you have flexibility later.
Make sure its manual settings are easy to adjust on the fly.
Importance of a Sturdy Tripod
A steady base is a must when working with low light. In dim situations, even the tiniest shake can ruin an otherwise good shot. A solid tripod is your best friend in these conditions. It keeps your camera stable, allowing you to experiment with longer exposures. Here’s why a good tripod is key:
It reduces camera shake, which is critical when the shutter speeds slow down.
It ensures that your composition remains consistent, shot after shot.
It can be adjusted quickly to match the fleeting moments of fading light.
When you're out shooting in the shifting light of dusk, having reliable gear not only saves time, it keeps your vision intact.
Lens Selection for Low Light
Picking the right lens can make all the difference in capturing crisp images during twilight. You want lenses that work well in low light and allow plenty of light to hit the sensor. Some features to look for include a wide maximum aperture and good image stabilization. Here’s a quick rundown in table format:
Lens Type | Aperture | Focal Range |
|---|---|---|
Wide-Angle | f/2.8 | 16-35mm |
Standard Zoom | f/2.8 | 24-70mm |
Prime Lens | f/1.8 | Fixed |
Each type serves its purpose: Wide-angle lenses capture expansive views, standard zooms provide flexibility, and prime lenses offer sharpness in low light. By choosing the right combination of camera, tripod, and lens, you'll be more prepared to capture the magic of twilight real estate scenes without unnecessary stress.
Techniques for Capturing Stunning Twilight Shots
Balancing Natural and Artificial Light
Getting the mix right between outside ambient light and the house’s own glow can make all the difference. Start by setting your camera for both the softer natural tones and the brightness of interior lights. Try these simple steps:
Check the available light before you shoot
Tweak your white balance accordingly
Subtly compensate using in-camera settings
A balanced mix of light sources is what brings out the best in a property shot.
Keep an eye on how the colors merge, and adjust on the fly. Sometimes, even a small tweak can help capture that perfect combination of light and shadow.
Utilizing Long Exposures
Long exposures help in catching the gradual dimming in twilight scenes, but they come with some care instructions. It’s a smart idea to use a steady tripod to avoid any blur. Here’s a quick table of shutter speed settings to try out:
Shutter Speed | When to Use | Note |
|---|---|---|
1-2 seconds | Slightly dim scenes | Captures mild glow |
2-3 seconds | When natural light rapidly fades | Ideal for added ambiance |
3+ seconds | Very dim conditions | Use with extra stability |
A slow shutter speed can work wonders, so don't hesitate to experiment within this range.
Framing the Perfect Shot
When it comes to composition, the small details count. Begin by scouting out your shot, keeping the building and its features in mind. It helps to follow these steps:
Position your camera to capture both the building and the sky.
Use elements like trees or fences to add depth.
Double-check the balance between light and shadow.
Also, consider using wide-angle lenses to capture a more expansive and spacious look that shows off the property nicely.
Taking a moment to reframe can turn a decent shot into a really great one, so always give yourself time to adjust your view before clicking away.
These techniques, mixed with a bit of patience and trial, often lead to truly impressive twilight photos. Go ahead and test them out on your next shoot!
Do’s and Don’ts of Twilight Photography
Planning Ahead for Optimal Conditions
Prepare well by checking the weather and understanding the window when twilight hits its best. Don't underestimate the power of planning. Aim to scout your location early and set up your equipment before the light shifts. Here are some steps you might follow:
Check the local forecast and sunset times.
See that all exterior lights and decorative fixtures are functional.
Arrive ahead of time to set up and survey the scene.
For additional insights on setup strategies, try exploring property photography.
Avoiding Common Mistakes
It's easy to slip into habits that can ruin your captures. Avoid these common errors:
Relying solely on auto settings, which often miss the subtle shifts in light.
Skipping on a steady tripod, leading to blurry images in low light.
Over-editing your photos, which can make them look unnatural.
Keeping these pitfalls in mind will help you stay on track and capture a genuine twilight feel.
Editing Tips for Twilight Photos
When it comes to post-processing, subtle adjustments are key. Try to keep the natural ambiance intact while sharpening the details. Consider the following quick tips in your editing workflow:
Tip | Benefit |
|---|---|
Adjust Exposure | Keeps the natural brightness in |
Moderate Saturation | Maintains realistic color tones |
Fine-Tune Contrast | Enhances details without overdoing it |
Taking a moment to review your edits with fresh eyes can make a big difference. Step back and assess – small changes often have the largest impact.
Remember, less is usually more when you want your twilight images to feel real and inviting, preserving that unique twilight essence in every shot.
Creating Mood with Light Effects
In real estate photography during twilight, playing with light is what makes a home look inviting and unique. Even simple adjustments can change the feel of a shot dramatically.
Using Color Temperature Effectively
Getting the color temperature just right can turn a plain shot into something quite appealing. Using warmer tones for a cozy feel or cooler shades for a modern vibe is all about balance. Here are some simple ideas:
Check your white balance settings before the shoot
Adjust exposure to catch that gentle glow
Use a lens filter if needed
For instance, when you work with lighting, consider reviewing photo editing tips to fine-tune your images later. Light can transform any property into a welcoming home.
A brief comparison of color settings might look like this:
Scene Type | Temperature Setting | Mood Description |
|---|---|---|
Clear Evening | 5500K - 6000K | Natural and balanced |
Overcast Dusk | 6000K - 6500K | Cool with soft shadows |
Artificial Glow | 2800K - 3200K | Warm and inviting |
Highlighting Property Features
Using light creatively can make features pop. It’s not just about brightness; it’s about guiding the viewer’s eye to important details. Consider these steps:
Illuminate entryways to draw in the eye
Use focused light for windows or outdoor landscaping
Soften harsh shadows to keep attention on the design
This approach helps in showcasing the property’s character without overdoing it, letting nature and light work together.
Setting the Right Atmosphere
A good atmosphere in a twilight shot shows a blend of warmth and calm. Below is a short table with elements you can play with to set the mood:
Key Element | Effect | Comment |
|---|---|---|
Soft Shadows | Creates calm vibe | Best achieved with controlled long exposures |
Warm Glow | Invites comfort | Subtle fill lights make a difference |
Cool Hues | Modern appearance | Use sparingly for a balanced look |
Paying attention to small adjustments, like a slight shift in color balance, can shift the entire mood of a scene. Twilight periods offer a unique spectrum that can work in your favor if handled with care.
By mixing light effects thoughtfully, you can turn a routine real estate shot into something memorable. The interplay between natural and artificial light is your best friend here, so experiment and see what works best for each property.
Post-Processing for Twilight Images
Enhancing Colors and Contrast
After you finish shooting your twilight photos, the real magic starts in editing. You might want to tweak the colors and contrast to bring out the property’s details better. A few steps to follow:
Adjust the white balance so that the colors remain true to life.
Tinker with the contrast slider to separate the shadows from the highlights.
Use saturation adjustments cautiously; too much change can ruin the natural feel.
You can reference some light adjustments in your editing workflow.
A simple table can help you keep track of your tweaks:
Adjustment | Suggested Range | Impact |
|---|---|---|
Temperature | +10 to +30 | Warms up the image |
Tint | -5 to +5 | Balances skin tones |
Contrast | +15 to +25 | Enhances separation |
Maintaining Natural Look
Sometimes we get carried away with editing, but it’s important to keep the image feel real. Stick to minor tweaks to retain that natural vibe. For instance, even if things look too dramatic, a small reduction in vibrancy can maintain authenticity. One key tip: always compare before and after edits to ensure you’re not overdoing it.
Final Touches for Professional Quality
Bringing everything together with final adjustments is where you give your photo that final polish. Here are some steps to consider:
Crop and straighten your image to correct any camera tilt.
Apply selective adjustments to bright areas if necessary.
Add a touch of sharpening to bring out texture details.
Post-processing can make your twilight images pop. It’s the finishing step that ensures your hard work during the shoot doesn’t go to waste.
Keep your edits moderate and always aim for a balance between reality and a slightly enhanced look. This way, your images display professional quality without feeling artificial.
Wrapping It Up
In conclusion, twilight photos can really make a difference in how a property is perceived. They add a special touch that daytime shots just can't match. By following the tips we've discussed, you can create stunning images that grab attention and make potential buyers stop and take notice. Remember, the goal is to create a warm, inviting atmosphere that makes people feel at home. So, whether you're a seasoned pro or just starting out, don't underestimate the power of a well-timed twilight shot. It could be the key to making your listings shine.
Frequently Asked Questions
What is twilight photography?
Twilight photography captures images during the time just after sunset or just before sunrise. It creates a beautiful mix of natural and artificial light.
Why should I use twilight photos for real estate?
Twilight photos make properties look more inviting and can help attract more potential buyers by showing off the home in a unique way.
When is the best time to take twilight photos?
The best time is about 20 minutes after sunset or before sunrise, when the sky has beautiful colors.
What equipment do I need for twilight photography?
You will need a good camera, a sturdy tripod to keep your shots steady, and a lens that works well in low light.
How can I edit twilight photos?
Editing should enhance the colors and contrast while keeping the photo looking natural. Avoid over-editing to keep it realistic.
What are some common mistakes in twilight photography?
Common mistakes include forgetting to turn on interior lights, relying only on automatic camera settings, and not planning for the right time.
Capturing stunning twilight photos for real estate can make a property shine. The right images can draw potential buyers in and make a lasting impression. In this guide, we'll explore how to take those perfect twilight shots, from timing and equipment to techniques and post-processing. Let's dive into the world of twilight photography and learn how to make your listings stand out.
Key Takeaways
Twilight photography significantly boosts property appeal and listing views.
Timing is key; aim for the golden hour just after sunset or before sunrise.
A sturdy tripod and the right lens are essential for low-light conditions.
Balancing natural and artificial light creates captivating images.
Post-processing is crucial; enhance colors while keeping the look natural.
The Impact of Twilight Photography in Real Estate
Enhancing Property Appeal
Ever notice how a house looks way more inviting when it's bathed in that soft, dim light? Twilight photography really pulls that effect off, making the place look warm and welcoming. This is a game changer for real estate photos. It brings a fresh twist to a listing and highlights unique outdoor features—like pool lights or garden spots—that might get lost in harsh daylight. For example, many agents now rave about the way Twilight shots add an extra layer of charm, giving viewers a hint of ambiance that ordinary photos just don’t show.
Increasing Listing Views
When homes are photographed at twilight, they tend to stand out in online listings. This isn’t just about soft lighting; it’s about creating an image that sparks interest. Here are a few reasons why listings see more clicks:
The warm glow melts away the usual flat look
Shadows add a sense of mystery and depth
Cooler, balanced light draws the eye
The effect is that potential buyers often pause a bit longer on these images, which can help increase overall engagement.
Creating Emotional Connections
Twilight photos don’t just show a property; they tell a story. Many buyers have fond memories of a sunset walk or the calm after a busy day, which these images evoke. They invite you to imagine your evenings in a cozy, well-lit home.
There’s something uniquely comforting about seeing a home softly lit at dusk, almost like it's inviting you in after a long day.
This personal touch often nudges buyers into picturing themselves living in the space, which can make all the difference when a decision hangs in the balance.
Picking the Right Time of Day
Understanding Twilight Timing
It all starts with nailing the right moment. At twilight, natural light dances quickly, so timing is everything. Many photographers say that the best period is about 20 minutes after sunrise or before sunset when colors pop and shadows settle. A simple plan would be:
Arrive at least an hour early to set up
Get comfortable with your camera settings
Keep an eye on the changing light
You might even consider checking real estate shots for extra ideas on timing.
Below is a quick reference table to keep track of key moments:
Time Period | Duration Estimate | Note |
|---|---|---|
Early Morning Glow | ~10-15 minutes | Gentle light, ideal for details |
Pre-Sunset Window | ~10-15 minutes | Rich warm tones, inviting feel |
Setup Preparation | ~60 minutes prior | Ensure all gears are in place |
Golden Hour Significance
The golden hour brings warmth and a soft quality to every photo. This window can transform a simple property shot into something much more inviting. Remember, sometimes less is more; a few careful shots during this time can speak louder than a bulk of photos. Time is the key factor in a perfect shot. The light during this period is naturally flattering, emphasizing curves and textures, making the property look extra appealing.
Shoot at the right angle
Adjust camera settings to match the dimming light
Keep testing and occasionally review your setup
It's no wonder many pros swear by the golden hour for that extra bit of magic.
Setting Up for Success
Good preparation goes a long way. Visit the property early, inspect where the light falls, and decide on the best spots for each shot. Make adjustments in your equipment based on what you see. Some photographers even bracket exposures to cover the subtle light changes.
Being ready means you won’t be caught off guard. Planning your angles and settings can make the difference between a missed moment and a captivating shot.
While there are many small details to consider, a calm mindset and solid plan set you up for success. Keep these pointers in mind and enjoy the process – capturing the perfect twilight scene is as much about patience as it is about skill.
Equipment Essentials for Twilight Photography
Choosing the Right Camera
When the light starts to fade, you need a camera that can handle low light without a hitch. Look for one that does well in dim conditions, offers manual controls, and has a good sensor. Consider these points when picking a camera:
Look for models with low noise at higher sensitivities.
Check if it supports RAW capture, so you have flexibility later.
Make sure its manual settings are easy to adjust on the fly.
Importance of a Sturdy Tripod
A steady base is a must when working with low light. In dim situations, even the tiniest shake can ruin an otherwise good shot. A solid tripod is your best friend in these conditions. It keeps your camera stable, allowing you to experiment with longer exposures. Here’s why a good tripod is key:
It reduces camera shake, which is critical when the shutter speeds slow down.
It ensures that your composition remains consistent, shot after shot.
It can be adjusted quickly to match the fleeting moments of fading light.
When you're out shooting in the shifting light of dusk, having reliable gear not only saves time, it keeps your vision intact.
Lens Selection for Low Light
Picking the right lens can make all the difference in capturing crisp images during twilight. You want lenses that work well in low light and allow plenty of light to hit the sensor. Some features to look for include a wide maximum aperture and good image stabilization. Here’s a quick rundown in table format:
Lens Type | Aperture | Focal Range |
|---|---|---|
Wide-Angle | f/2.8 | 16-35mm |
Standard Zoom | f/2.8 | 24-70mm |
Prime Lens | f/1.8 | Fixed |
Each type serves its purpose: Wide-angle lenses capture expansive views, standard zooms provide flexibility, and prime lenses offer sharpness in low light. By choosing the right combination of camera, tripod, and lens, you'll be more prepared to capture the magic of twilight real estate scenes without unnecessary stress.
Techniques for Capturing Stunning Twilight Shots
Balancing Natural and Artificial Light
Getting the mix right between outside ambient light and the house’s own glow can make all the difference. Start by setting your camera for both the softer natural tones and the brightness of interior lights. Try these simple steps:
Check the available light before you shoot
Tweak your white balance accordingly
Subtly compensate using in-camera settings
A balanced mix of light sources is what brings out the best in a property shot.
Keep an eye on how the colors merge, and adjust on the fly. Sometimes, even a small tweak can help capture that perfect combination of light and shadow.
Utilizing Long Exposures
Long exposures help in catching the gradual dimming in twilight scenes, but they come with some care instructions. It’s a smart idea to use a steady tripod to avoid any blur. Here’s a quick table of shutter speed settings to try out:
Shutter Speed | When to Use | Note |
|---|---|---|
1-2 seconds | Slightly dim scenes | Captures mild glow |
2-3 seconds | When natural light rapidly fades | Ideal for added ambiance |
3+ seconds | Very dim conditions | Use with extra stability |
A slow shutter speed can work wonders, so don't hesitate to experiment within this range.
Framing the Perfect Shot
When it comes to composition, the small details count. Begin by scouting out your shot, keeping the building and its features in mind. It helps to follow these steps:
Position your camera to capture both the building and the sky.
Use elements like trees or fences to add depth.
Double-check the balance between light and shadow.
Also, consider using wide-angle lenses to capture a more expansive and spacious look that shows off the property nicely.
Taking a moment to reframe can turn a decent shot into a really great one, so always give yourself time to adjust your view before clicking away.
These techniques, mixed with a bit of patience and trial, often lead to truly impressive twilight photos. Go ahead and test them out on your next shoot!
Do’s and Don’ts of Twilight Photography
Planning Ahead for Optimal Conditions
Prepare well by checking the weather and understanding the window when twilight hits its best. Don't underestimate the power of planning. Aim to scout your location early and set up your equipment before the light shifts. Here are some steps you might follow:
Check the local forecast and sunset times.
See that all exterior lights and decorative fixtures are functional.
Arrive ahead of time to set up and survey the scene.
For additional insights on setup strategies, try exploring property photography.
Avoiding Common Mistakes
It's easy to slip into habits that can ruin your captures. Avoid these common errors:
Relying solely on auto settings, which often miss the subtle shifts in light.
Skipping on a steady tripod, leading to blurry images in low light.
Over-editing your photos, which can make them look unnatural.
Keeping these pitfalls in mind will help you stay on track and capture a genuine twilight feel.
Editing Tips for Twilight Photos
When it comes to post-processing, subtle adjustments are key. Try to keep the natural ambiance intact while sharpening the details. Consider the following quick tips in your editing workflow:
Tip | Benefit |
|---|---|
Adjust Exposure | Keeps the natural brightness in |
Moderate Saturation | Maintains realistic color tones |
Fine-Tune Contrast | Enhances details without overdoing it |
Taking a moment to review your edits with fresh eyes can make a big difference. Step back and assess – small changes often have the largest impact.
Remember, less is usually more when you want your twilight images to feel real and inviting, preserving that unique twilight essence in every shot.
Creating Mood with Light Effects
In real estate photography during twilight, playing with light is what makes a home look inviting and unique. Even simple adjustments can change the feel of a shot dramatically.
Using Color Temperature Effectively
Getting the color temperature just right can turn a plain shot into something quite appealing. Using warmer tones for a cozy feel or cooler shades for a modern vibe is all about balance. Here are some simple ideas:
Check your white balance settings before the shoot
Adjust exposure to catch that gentle glow
Use a lens filter if needed
For instance, when you work with lighting, consider reviewing photo editing tips to fine-tune your images later. Light can transform any property into a welcoming home.
A brief comparison of color settings might look like this:
Scene Type | Temperature Setting | Mood Description |
|---|---|---|
Clear Evening | 5500K - 6000K | Natural and balanced |
Overcast Dusk | 6000K - 6500K | Cool with soft shadows |
Artificial Glow | 2800K - 3200K | Warm and inviting |
Highlighting Property Features
Using light creatively can make features pop. It’s not just about brightness; it’s about guiding the viewer’s eye to important details. Consider these steps:
Illuminate entryways to draw in the eye
Use focused light for windows or outdoor landscaping
Soften harsh shadows to keep attention on the design
This approach helps in showcasing the property’s character without overdoing it, letting nature and light work together.
Setting the Right Atmosphere
A good atmosphere in a twilight shot shows a blend of warmth and calm. Below is a short table with elements you can play with to set the mood:
Key Element | Effect | Comment |
|---|---|---|
Soft Shadows | Creates calm vibe | Best achieved with controlled long exposures |
Warm Glow | Invites comfort | Subtle fill lights make a difference |
Cool Hues | Modern appearance | Use sparingly for a balanced look |
Paying attention to small adjustments, like a slight shift in color balance, can shift the entire mood of a scene. Twilight periods offer a unique spectrum that can work in your favor if handled with care.
By mixing light effects thoughtfully, you can turn a routine real estate shot into something memorable. The interplay between natural and artificial light is your best friend here, so experiment and see what works best for each property.
Post-Processing for Twilight Images
Enhancing Colors and Contrast
After you finish shooting your twilight photos, the real magic starts in editing. You might want to tweak the colors and contrast to bring out the property’s details better. A few steps to follow:
Adjust the white balance so that the colors remain true to life.
Tinker with the contrast slider to separate the shadows from the highlights.
Use saturation adjustments cautiously; too much change can ruin the natural feel.
You can reference some light adjustments in your editing workflow.
A simple table can help you keep track of your tweaks:
Adjustment | Suggested Range | Impact |
|---|---|---|
Temperature | +10 to +30 | Warms up the image |
Tint | -5 to +5 | Balances skin tones |
Contrast | +15 to +25 | Enhances separation |
Maintaining Natural Look
Sometimes we get carried away with editing, but it’s important to keep the image feel real. Stick to minor tweaks to retain that natural vibe. For instance, even if things look too dramatic, a small reduction in vibrancy can maintain authenticity. One key tip: always compare before and after edits to ensure you’re not overdoing it.
Final Touches for Professional Quality
Bringing everything together with final adjustments is where you give your photo that final polish. Here are some steps to consider:
Crop and straighten your image to correct any camera tilt.
Apply selective adjustments to bright areas if necessary.
Add a touch of sharpening to bring out texture details.
Post-processing can make your twilight images pop. It’s the finishing step that ensures your hard work during the shoot doesn’t go to waste.
Keep your edits moderate and always aim for a balance between reality and a slightly enhanced look. This way, your images display professional quality without feeling artificial.
Wrapping It Up
In conclusion, twilight photos can really make a difference in how a property is perceived. They add a special touch that daytime shots just can't match. By following the tips we've discussed, you can create stunning images that grab attention and make potential buyers stop and take notice. Remember, the goal is to create a warm, inviting atmosphere that makes people feel at home. So, whether you're a seasoned pro or just starting out, don't underestimate the power of a well-timed twilight shot. It could be the key to making your listings shine.
Frequently Asked Questions
What is twilight photography?
Twilight photography captures images during the time just after sunset or just before sunrise. It creates a beautiful mix of natural and artificial light.
Why should I use twilight photos for real estate?
Twilight photos make properties look more inviting and can help attract more potential buyers by showing off the home in a unique way.
When is the best time to take twilight photos?
The best time is about 20 minutes after sunset or before sunrise, when the sky has beautiful colors.
What equipment do I need for twilight photography?
You will need a good camera, a sturdy tripod to keep your shots steady, and a lens that works well in low light.
How can I edit twilight photos?
Editing should enhance the colors and contrast while keeping the photo looking natural. Avoid over-editing to keep it realistic.
What are some common mistakes in twilight photography?
Common mistakes include forgetting to turn on interior lights, relying only on automatic camera settings, and not planning for the right time.