February 21, 2025
10 Common Real Estate Photography Mistakes and How to Avoid Them

Stay Ahead in Real Estate Marketing!
Stay Ahead in Real Estate Marketing!
Stay Ahead in Real Estate Marketing!
Join our newsletter for exclusive tips, tools, and updates to transform your listings and grow your business.
When it comes to selling a home, photos are everything. They’re often the first impression a buyer gets, and let’s face it, no one’s clicking on a listing with bad pictures. But here’s the thing—real estate photography isn’t as easy as just snapping a few shots on your phone. There are some common mistakes that can totally ruin a listing’s vibe. Don’t worry, though. We’re breaking down the 10 most common real estate photography mistakes and, more importantly, how to avoid them.
Key Takeaways
Angles matter—a lot. The right angle can make a room look spacious, while the wrong one can make it look cramped.
Blurry photos scream unprofessional. Use a tripod or steady your hand to get sharp images.
Balanced lighting is key. Learn to use bracketing to avoid overexposed windows or dark corners.
Don’t forget the outside! A well-shot exterior can make all the difference.
Avoid capturing your reflection in mirrors or windows. It’s distracting and looks amateur.
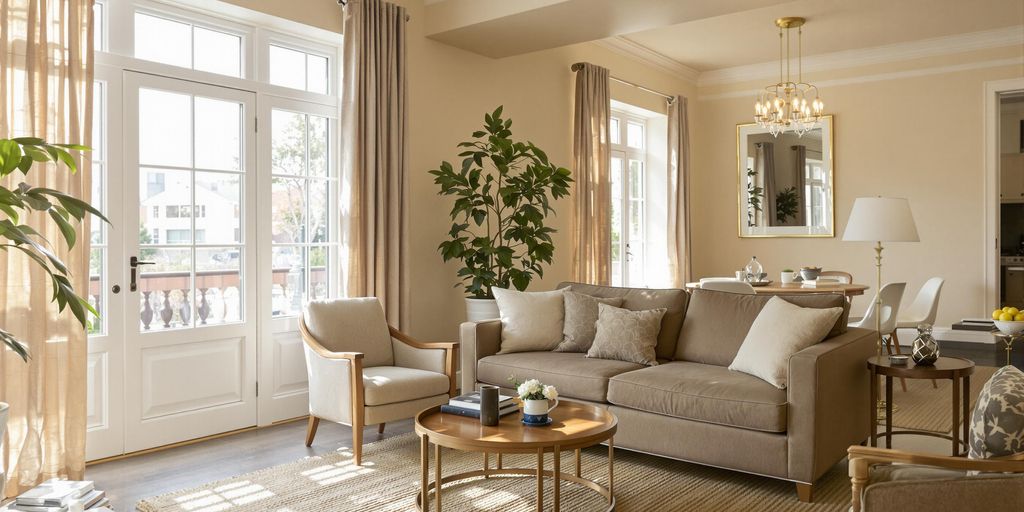
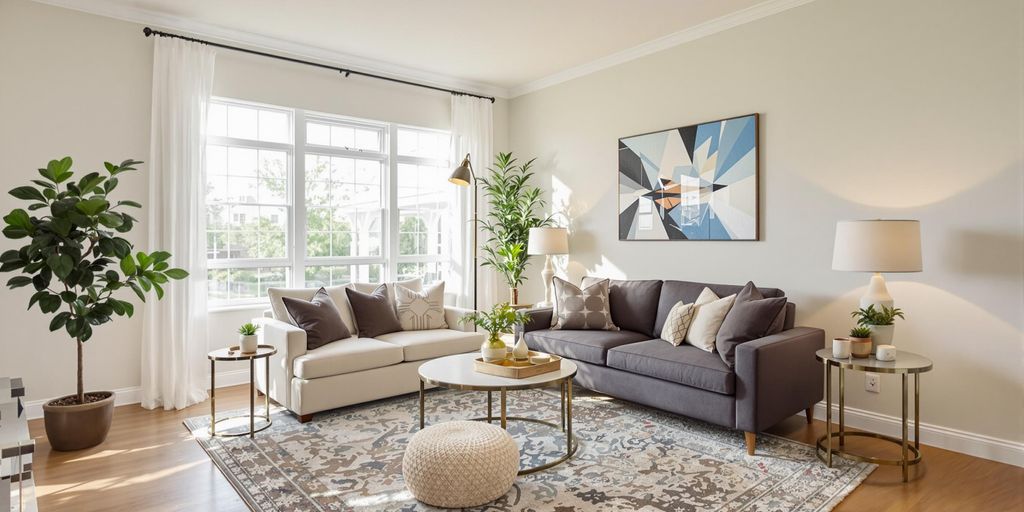
1. Ignoring Angles
When it comes to real estate photography, angles are everything. A well-chosen angle can make a room feel spacious and inviting, while a poor one might leave it looking cramped and unappealing. The way you position your camera directly impacts how potential buyers perceive the space. Learn more about how virtual staging AI can transform your listings.
Here are a few tips to get your angles right:
Experiment with multiple perspectives. Don’t settle for the first shot you take. Move around, crouch down, or elevate the camera to see how the room transforms.
Keep lines straight. Crooked walls or tilted floors can make a photo look unprofessional. Use a tripod or the grid feature on your camera to maintain balance.
Highlight the room’s best features. Whether it’s a large window, a cozy fireplace, or unique architectural details, make sure your angle emphasizes what makes the space special.
Take your time with angles. A little extra effort can make all the difference in how a property is perceived.
2. Featuring Blurry or Poor-Quality Photos
Blurry or poor-quality photos can instantly turn potential buyers away from a listing. Clear, sharp images are non-negotiable when showcasing a property. A bad photo doesn’t just fail to capture attention—it actively pushes it away. Here’s how to avoid this common mistake:
Use a tripod: A tripod helps eliminate camera shake and ensures steady shots, especially in low-light conditions.
Master your camera settings: Adjust the shutter speed, aperture, and ISO to optimize clarity. Be cautious with ISO—too high, and you’ll introduce digital noise.
Invest in good equipment: Full-frame cameras are ideal for real estate photography because they capture more light and handle noise better than smaller sensors.
A single blurry image in your listing can make buyers question the overall quality of the home. It’s worth taking the extra time to get it right.
Lastly, don’t forget about post-processing. While editing can’t completely fix a blurry photo, it can enhance sharpness and correct minor flaws. For more examples of what not to do, check out common examples of bad photography.
3. Not Using Bracketing for Balanced Lighting
Bracketing is one of those techniques that might sound fancy, but it’s really just a smart way to get lighting right in your photos. Here’s the deal: when you’re shooting a room, you’ve got bright windows and darker interiors, and it’s tough to capture both perfectly in one shot. That’s where bracketing comes in.
Bracketing involves taking multiple shots of the same scene at different exposure levels. Think of it like this:
One photo captures the bright areas, like the sunlight streaming through the windows.
Another photo focuses on the darker spots, like the shadows in the corners.
A third shot might balance somewhere in between.
Later, you blend these images together (using editing software) to create a photo that shows both the interior details and the view outside without anything looking too overexposed or too dark. It’s like giving every part of the photo its moment to shine.
Skipping bracketing can leave your photos looking uneven, which might make potential buyers scroll past your listing.
If you’re wondering why this matters, it’s because lighting is everything in real estate photography. A well-lit photo makes a space feel open, inviting, and worth checking out. So, next time you’re shooting, give bracketing a try—it might just become your new favorite trick.
4. Failing to Show the Exterior Properly
When it comes to real estate photography, the exterior of a property is your first chance to make an impression. Ignoring this aspect can turn potential buyers away before they even step inside. Here's how to make sure you're showcasing the outside of a property effectively:
Highlight Curb Appeal: Start by ensuring the front yard, driveway, and entryway are clean and inviting. A freshly mowed lawn, trimmed hedges, and a swept walkway can make a big difference.
Showcase Outdoor Features: If the property has a pool, patio, garden, or deck, these should be photographed as well. These spaces often add significant value and appeal.
Choose the Right Time: Lighting is everything. Photograph the exterior during the "golden hour"—just after sunrise or before sunset—for soft, flattering light.
Mind the Weather: A bright, sunny day is ideal for exterior shots. Avoid overcast or rainy days, as they can make the property look dull and uninviting.
A well-captured exterior photo doesn’t just show a house—it paints a picture of a home waiting to be lived in.
For editing tips to enhance these images, consider checking out this guide on editing exterior real estate photos.
5. Using a Flash
Using a flash in real estate photography can be tricky. Pointing the flash directly into a room often creates harsh shadows and uneven lighting, which can make a space feel uninviting. Instead, try bouncing the light off a ceiling or wall. Discover how virtual staging AI increases buyer engagement.
Here are some quick tips to handle flash lighting effectively:
Use a diffuser to soften the light and reduce harsh shadows.
Adjust the flash brightness when bouncing light to ensure it fills the space adequately.
Combine flash with natural light to maintain a balanced and natural look.
Proper use of flash can make a huge difference in how a property feels in photos. It’s all about creating a warm, inviting atmosphere without overpowering the room with artificial lighting.
If you're struggling with lighting balance, consider experimenting with different angles and tools to avoid overexposing or underexposing key areas. Even small tweaks can dramatically improve the overall quality of your shots.
6. Including Expensive Objects
Including expensive objects in real estate photos can backfire more than you think. It’s not just about aesthetics—it’s about security. Showcasing costly items, like high-end electronics, luxury furniture, or even rare collectibles, can make the property a target for theft. Potential buyers don’t need to see these items unless they’re part of the deal. If they’re not included in the sale, why risk it?
Here’s how to avoid this mistake:
Remove valuables: Before the shoot, ask homeowners to store expensive items out of sight. This includes jewelry, gadgets, or anything that screams “high price tag.”
Focus on the space: Highlight the room’s layout, lighting, and potential—not the stuff inside it.
Use neutral staging: Replace standout items with simple, neutral decor to keep the focus on the property itself.
A clean, distraction-free environment helps buyers picture their own lives in the space, rather than focusing on the current owner’s belongings.
By keeping expensive items out of the frame, you not only protect the homeowner but also make the listing appeal to a wider audience. After all, it’s the home you’re selling—not the stuff in it.
7. Taking Pictures Without a List
Creating a shot list before starting a real estate photography session might seem like an unnecessary step, but trust me, it makes all the difference. Skipping this step can lead to missed opportunities, overlooked property features, and wasted time backtracking. A shot list is your roadmap for the shoot. It ensures you capture everything the client expects and keeps you organized, especially when time is tight.
Why You Need a Shot List
Efficiency: You won’t waste time deciding what to shoot next.
Thoroughness: Important details, like unique architectural features or outdoor amenities, won’t be forgotten.
Professionalism: A clear plan shows clients you’re prepared and serious about your work.
Tips for Creating a Great Shot List
Start with the basics: wide shots of every room, the kitchen, bathrooms, and any standout spaces.
Add specific client requests, like highlighting a newly renovated patio or a custom fireplace.
Don’t forget the exterior: include curb appeal shots, backyard views, and any outdoor features like a pool or garden.
A well-thought-out shot list doesn’t just save time—it makes sure the final images tell a complete story of the property. It’s a small step that can have a big impact on the quality of your work.
8. Including Pets
We all adore our furry companions, but when it comes to real estate photography, they don’t belong in the frame. Pets can be a major distraction in property photos, pulling attention away from the home’s features. While they might be cute, they can also make potential buyers focus on the wrong thing.
Here’s why you should keep pets out of the shot:
Some buyers may have allergies or simply dislike animals, which could create a negative impression of the home.
Pets can give the impression that the property might have odors, stains, or damage, even if that’s not the case.
They might unintentionally clutter the image, making the space look less clean or professional.
A clean, neutral space helps buyers imagine themselves living there—pets in the photo can break that illusion.
Before taking photos, make sure to:
Remove pet toys, beds, and food bowls from the area.
Keep pets in a separate room or outside while shooting.
Double-check for any fur or mess that might have been left behind.
By keeping pets out of the picture, you ensure the focus stays on the home itself, giving it the best chance to appeal to every buyer.
9. Selecting the Wrong Lens
Choosing the right lens for real estate photography can make or break your shots. The wrong lens can distort spaces or fail to capture the room's full potential.
Why Lens Choice Matters
The lens you pick directly affects how the space is portrayed. A poor choice could make rooms look cramped or overly distorted, misleading potential buyers.
Common Lens Mistakes
Using a Fisheye Lens: While fisheye lenses can capture wide areas, they often create unnatural distortion, making rooms appear warped.
Going Too Narrow: A lens that's too narrow may fail to capture the full scope of a room, leaving out important details.
Not Considering Sensor Type: A 16mm lens on a cropped sensor won't give the same result as on a full-frame sensor, so always match your lens to your camera type.
Final Thoughts
Experiment with your lenses before heading out for a shoot. This way, you’ll know exactly how each one performs in different scenarios. And remember, a great lens choice can set the right tone for the entire property listing.
10. Accidentally Capturing Your Own Reflection
When photographing properties, mirrors and reflective surfaces can easily catch you off guard. Bathrooms, kitchens, and even glossy furniture can reveal your reflection if you're not careful. This is one of the quickest ways to make your photos look unprofessional.
Tips to Avoid Reflections:
Adjust Your Position: Stand slightly to the side or at an angle to reflective surfaces like mirrors or windows. Sometimes, stepping higher or lower can also help.
Plan Your Shots: Before clicking, scan the frame for any reflective surfaces that might reveal you or your equipment.
Use a Tripod and Timer: Position the camera, then step away before the shot is taken to eliminate any chance of being caught in the frame.
Taking the time to check for reflections may seem tedious, but it ensures the focus stays on the property, not on unintended distractions.
If you’ve already taken a photo with a reflection, editing tools can help. However, it’s always better to avoid the issue during the shoot itself. Funny mistakes like these are often shared on popular social media accounts, but they’re not the kind of attention you want for your real estate photography.
Wrapping It Up
Real estate photography can be tricky, but avoiding common mistakes makes a world of difference. From blurry shots to bad lighting, each misstep can cost you potential buyers. The good news? With a little preparation and attention to detail, you can create photos that truly showcase a property’s best features. Whether you’re a seasoned pro or just starting out, keep these tips in mind, and you’ll be on your way to snapping photos that sell. Remember, every picture tells a story—make sure yours is a good one!
Frequently Asked Questions
Why are angles important in real estate photos?
Angles can make a room look bigger, brighter, or more inviting. The wrong angle can make a space feel cramped or unappealing.
How can I avoid blurry real estate pictures?
Use a tripod to keep your camera steady and take advantage of your camera's autofocus feature. This ensures sharp, clear images.
What is bracketing, and why should I use it?
Bracketing involves taking multiple photos at different exposures and combining them. This helps balance lighting and avoids overly bright or dark spots.
Should I include pets in real estate photos?
No, it's best to leave pets out. They can distract potential buyers and might not appeal to everyone.
Why is it a mistake to use flash in real estate photography?
Direct flash can create harsh shadows and unnatural lighting. Instead, use natural light or bounce the flash for softer effects.
How do I avoid capturing my reflection in photos?
Pay attention to mirrors, windows, and other reflective surfaces when framing your shots. Adjust your position to stay out of the frame.
When it comes to selling a home, photos are everything. They’re often the first impression a buyer gets, and let’s face it, no one’s clicking on a listing with bad pictures. But here’s the thing—real estate photography isn’t as easy as just snapping a few shots on your phone. There are some common mistakes that can totally ruin a listing’s vibe. Don’t worry, though. We’re breaking down the 10 most common real estate photography mistakes and, more importantly, how to avoid them.
Key Takeaways
Angles matter—a lot. The right angle can make a room look spacious, while the wrong one can make it look cramped.
Blurry photos scream unprofessional. Use a tripod or steady your hand to get sharp images.
Balanced lighting is key. Learn to use bracketing to avoid overexposed windows or dark corners.
Don’t forget the outside! A well-shot exterior can make all the difference.
Avoid capturing your reflection in mirrors or windows. It’s distracting and looks amateur.
1. Ignoring Angles
When it comes to real estate photography, angles are everything. A well-chosen angle can make a room feel spacious and inviting, while a poor one might leave it looking cramped and unappealing. The way you position your camera directly impacts how potential buyers perceive the space. Learn more about how virtual staging AI can transform your listings.
Here are a few tips to get your angles right:
Experiment with multiple perspectives. Don’t settle for the first shot you take. Move around, crouch down, or elevate the camera to see how the room transforms.
Keep lines straight. Crooked walls or tilted floors can make a photo look unprofessional. Use a tripod or the grid feature on your camera to maintain balance.
Highlight the room’s best features. Whether it’s a large window, a cozy fireplace, or unique architectural details, make sure your angle emphasizes what makes the space special.
Take your time with angles. A little extra effort can make all the difference in how a property is perceived.
2. Featuring Blurry or Poor-Quality Photos
Blurry or poor-quality photos can instantly turn potential buyers away from a listing. Clear, sharp images are non-negotiable when showcasing a property. A bad photo doesn’t just fail to capture attention—it actively pushes it away. Here’s how to avoid this common mistake:
Use a tripod: A tripod helps eliminate camera shake and ensures steady shots, especially in low-light conditions.
Master your camera settings: Adjust the shutter speed, aperture, and ISO to optimize clarity. Be cautious with ISO—too high, and you’ll introduce digital noise.
Invest in good equipment: Full-frame cameras are ideal for real estate photography because they capture more light and handle noise better than smaller sensors.
A single blurry image in your listing can make buyers question the overall quality of the home. It’s worth taking the extra time to get it right.
Lastly, don’t forget about post-processing. While editing can’t completely fix a blurry photo, it can enhance sharpness and correct minor flaws. For more examples of what not to do, check out common examples of bad photography.
3. Not Using Bracketing for Balanced Lighting
Bracketing is one of those techniques that might sound fancy, but it’s really just a smart way to get lighting right in your photos. Here’s the deal: when you’re shooting a room, you’ve got bright windows and darker interiors, and it’s tough to capture both perfectly in one shot. That’s where bracketing comes in.
Bracketing involves taking multiple shots of the same scene at different exposure levels. Think of it like this:
One photo captures the bright areas, like the sunlight streaming through the windows.
Another photo focuses on the darker spots, like the shadows in the corners.
A third shot might balance somewhere in between.
Later, you blend these images together (using editing software) to create a photo that shows both the interior details and the view outside without anything looking too overexposed or too dark. It’s like giving every part of the photo its moment to shine.
Skipping bracketing can leave your photos looking uneven, which might make potential buyers scroll past your listing.
If you’re wondering why this matters, it’s because lighting is everything in real estate photography. A well-lit photo makes a space feel open, inviting, and worth checking out. So, next time you’re shooting, give bracketing a try—it might just become your new favorite trick.
4. Failing to Show the Exterior Properly
When it comes to real estate photography, the exterior of a property is your first chance to make an impression. Ignoring this aspect can turn potential buyers away before they even step inside. Here's how to make sure you're showcasing the outside of a property effectively:
Highlight Curb Appeal: Start by ensuring the front yard, driveway, and entryway are clean and inviting. A freshly mowed lawn, trimmed hedges, and a swept walkway can make a big difference.
Showcase Outdoor Features: If the property has a pool, patio, garden, or deck, these should be photographed as well. These spaces often add significant value and appeal.
Choose the Right Time: Lighting is everything. Photograph the exterior during the "golden hour"—just after sunrise or before sunset—for soft, flattering light.
Mind the Weather: A bright, sunny day is ideal for exterior shots. Avoid overcast or rainy days, as they can make the property look dull and uninviting.
A well-captured exterior photo doesn’t just show a house—it paints a picture of a home waiting to be lived in.
For editing tips to enhance these images, consider checking out this guide on editing exterior real estate photos.
5. Using a Flash
Using a flash in real estate photography can be tricky. Pointing the flash directly into a room often creates harsh shadows and uneven lighting, which can make a space feel uninviting. Instead, try bouncing the light off a ceiling or wall. Discover how virtual staging AI increases buyer engagement.
Here are some quick tips to handle flash lighting effectively:
Use a diffuser to soften the light and reduce harsh shadows.
Adjust the flash brightness when bouncing light to ensure it fills the space adequately.
Combine flash with natural light to maintain a balanced and natural look.
Proper use of flash can make a huge difference in how a property feels in photos. It’s all about creating a warm, inviting atmosphere without overpowering the room with artificial lighting.
If you're struggling with lighting balance, consider experimenting with different angles and tools to avoid overexposing or underexposing key areas. Even small tweaks can dramatically improve the overall quality of your shots.
6. Including Expensive Objects
Including expensive objects in real estate photos can backfire more than you think. It’s not just about aesthetics—it’s about security. Showcasing costly items, like high-end electronics, luxury furniture, or even rare collectibles, can make the property a target for theft. Potential buyers don’t need to see these items unless they’re part of the deal. If they’re not included in the sale, why risk it?
Here’s how to avoid this mistake:
Remove valuables: Before the shoot, ask homeowners to store expensive items out of sight. This includes jewelry, gadgets, or anything that screams “high price tag.”
Focus on the space: Highlight the room’s layout, lighting, and potential—not the stuff inside it.
Use neutral staging: Replace standout items with simple, neutral decor to keep the focus on the property itself.
A clean, distraction-free environment helps buyers picture their own lives in the space, rather than focusing on the current owner’s belongings.
By keeping expensive items out of the frame, you not only protect the homeowner but also make the listing appeal to a wider audience. After all, it’s the home you’re selling—not the stuff in it.
7. Taking Pictures Without a List
Creating a shot list before starting a real estate photography session might seem like an unnecessary step, but trust me, it makes all the difference. Skipping this step can lead to missed opportunities, overlooked property features, and wasted time backtracking. A shot list is your roadmap for the shoot. It ensures you capture everything the client expects and keeps you organized, especially when time is tight.
Why You Need a Shot List
Efficiency: You won’t waste time deciding what to shoot next.
Thoroughness: Important details, like unique architectural features or outdoor amenities, won’t be forgotten.
Professionalism: A clear plan shows clients you’re prepared and serious about your work.
Tips for Creating a Great Shot List
Start with the basics: wide shots of every room, the kitchen, bathrooms, and any standout spaces.
Add specific client requests, like highlighting a newly renovated patio or a custom fireplace.
Don’t forget the exterior: include curb appeal shots, backyard views, and any outdoor features like a pool or garden.
A well-thought-out shot list doesn’t just save time—it makes sure the final images tell a complete story of the property. It’s a small step that can have a big impact on the quality of your work.
8. Including Pets
We all adore our furry companions, but when it comes to real estate photography, they don’t belong in the frame. Pets can be a major distraction in property photos, pulling attention away from the home’s features. While they might be cute, they can also make potential buyers focus on the wrong thing.
Here’s why you should keep pets out of the shot:
Some buyers may have allergies or simply dislike animals, which could create a negative impression of the home.
Pets can give the impression that the property might have odors, stains, or damage, even if that’s not the case.
They might unintentionally clutter the image, making the space look less clean or professional.
A clean, neutral space helps buyers imagine themselves living there—pets in the photo can break that illusion.
Before taking photos, make sure to:
Remove pet toys, beds, and food bowls from the area.
Keep pets in a separate room or outside while shooting.
Double-check for any fur or mess that might have been left behind.
By keeping pets out of the picture, you ensure the focus stays on the home itself, giving it the best chance to appeal to every buyer.
9. Selecting the Wrong Lens
Choosing the right lens for real estate photography can make or break your shots. The wrong lens can distort spaces or fail to capture the room's full potential.
Why Lens Choice Matters
The lens you pick directly affects how the space is portrayed. A poor choice could make rooms look cramped or overly distorted, misleading potential buyers.
Common Lens Mistakes
Using a Fisheye Lens: While fisheye lenses can capture wide areas, they often create unnatural distortion, making rooms appear warped.
Going Too Narrow: A lens that's too narrow may fail to capture the full scope of a room, leaving out important details.
Not Considering Sensor Type: A 16mm lens on a cropped sensor won't give the same result as on a full-frame sensor, so always match your lens to your camera type.
Final Thoughts
Experiment with your lenses before heading out for a shoot. This way, you’ll know exactly how each one performs in different scenarios. And remember, a great lens choice can set the right tone for the entire property listing.
10. Accidentally Capturing Your Own Reflection
When photographing properties, mirrors and reflective surfaces can easily catch you off guard. Bathrooms, kitchens, and even glossy furniture can reveal your reflection if you're not careful. This is one of the quickest ways to make your photos look unprofessional.
Tips to Avoid Reflections:
Adjust Your Position: Stand slightly to the side or at an angle to reflective surfaces like mirrors or windows. Sometimes, stepping higher or lower can also help.
Plan Your Shots: Before clicking, scan the frame for any reflective surfaces that might reveal you or your equipment.
Use a Tripod and Timer: Position the camera, then step away before the shot is taken to eliminate any chance of being caught in the frame.
Taking the time to check for reflections may seem tedious, but it ensures the focus stays on the property, not on unintended distractions.
If you’ve already taken a photo with a reflection, editing tools can help. However, it’s always better to avoid the issue during the shoot itself. Funny mistakes like these are often shared on popular social media accounts, but they’re not the kind of attention you want for your real estate photography.
Wrapping It Up
Real estate photography can be tricky, but avoiding common mistakes makes a world of difference. From blurry shots to bad lighting, each misstep can cost you potential buyers. The good news? With a little preparation and attention to detail, you can create photos that truly showcase a property’s best features. Whether you’re a seasoned pro or just starting out, keep these tips in mind, and you’ll be on your way to snapping photos that sell. Remember, every picture tells a story—make sure yours is a good one!
Frequently Asked Questions
Why are angles important in real estate photos?
Angles can make a room look bigger, brighter, or more inviting. The wrong angle can make a space feel cramped or unappealing.
How can I avoid blurry real estate pictures?
Use a tripod to keep your camera steady and take advantage of your camera's autofocus feature. This ensures sharp, clear images.
What is bracketing, and why should I use it?
Bracketing involves taking multiple photos at different exposures and combining them. This helps balance lighting and avoids overly bright or dark spots.
Should I include pets in real estate photos?
No, it's best to leave pets out. They can distract potential buyers and might not appeal to everyone.
Why is it a mistake to use flash in real estate photography?
Direct flash can create harsh shadows and unnatural lighting. Instead, use natural light or bounce the flash for softer effects.
How do I avoid capturing my reflection in photos?
Pay attention to mirrors, windows, and other reflective surfaces when framing your shots. Adjust your position to stay out of the frame.